Getting started with Tabithread
Follow the real interface from account creation and trip planning to recording on the road and publishing a travel journal.
This guide walks through the essential Tabithread workflow, from creating an account to publishing a travel journal. By the end, you will have seen how planning, recording, and publishing stay connected.
1. Create an account
- Open the sign-in page and select Create account.
- Enter your Email address and a Password of at least eight characters, then select Create account. To use a Google account instead, select Continue with Google.
- Email registration sends you a verification message. Open its link to finish registration and begin using Tabithread.
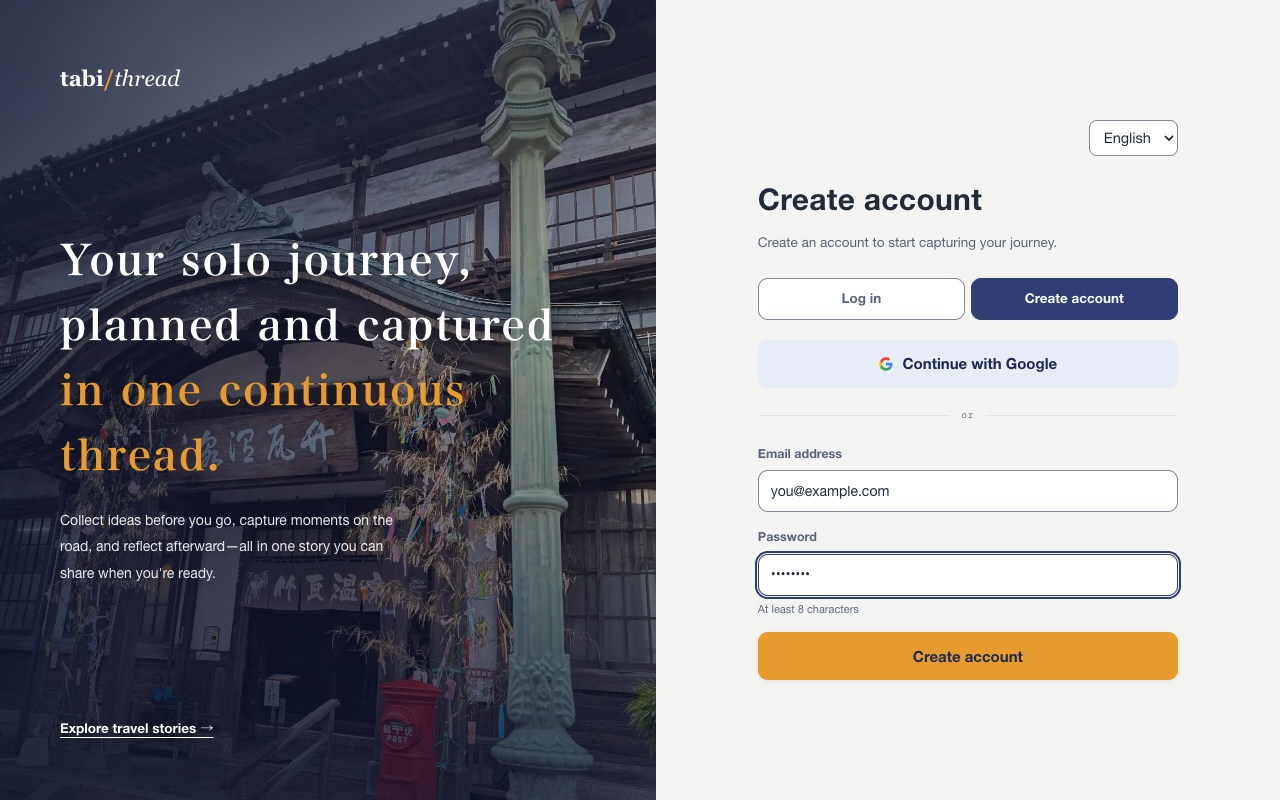
Enter an email address and password on the Create account tab.
2. Create a trip record
- After signing in, the My trips list opens. Select New trip in the upper-right corner.
- Enter a name such as “Two nights in Takayama.” Start and end dates are optional and can remain undecided.
- Select Create to open the planning screen for the trip.
A trip record is the home for one journey’s plan, on-the-road notes, and post-trip editing. Its state moves from planning to traveling to post-trip as the journey progresses.
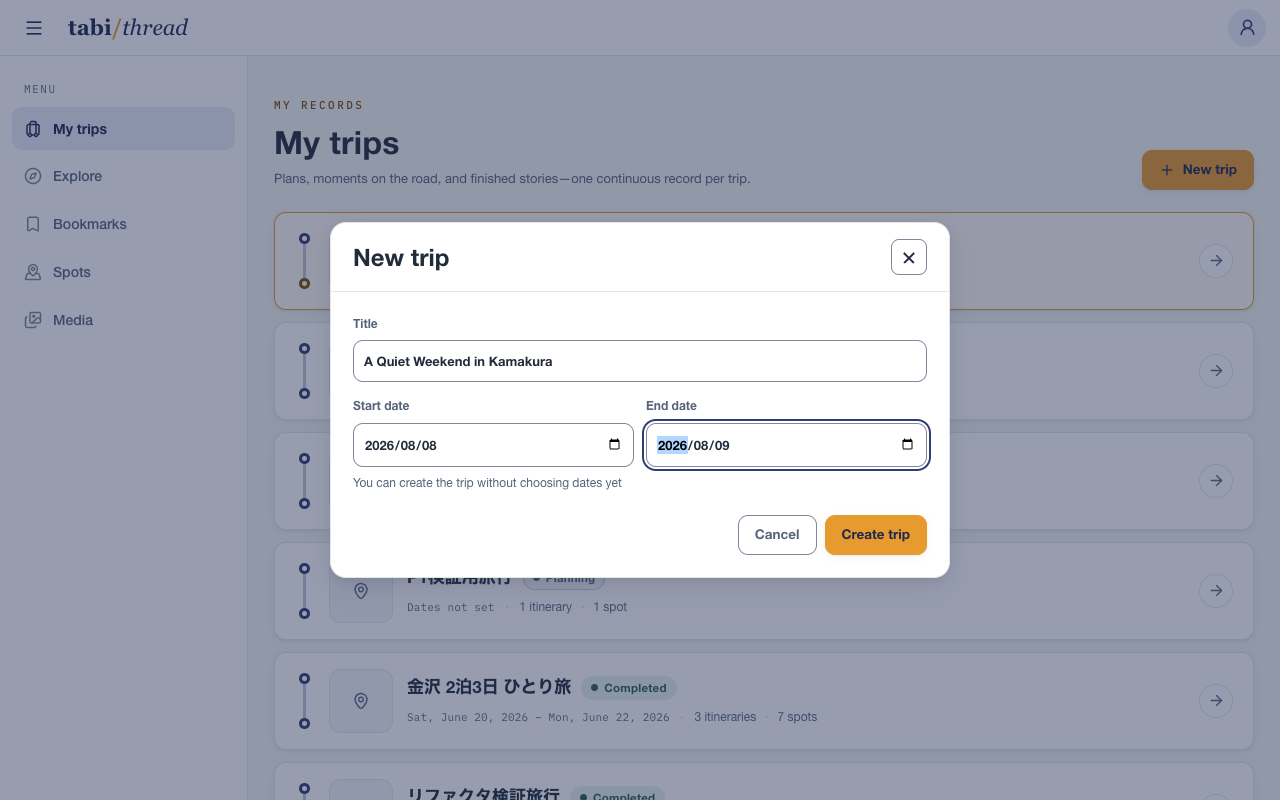
A title is enough to create the trip; dates can be added later.
3. Save a place as a spot
- In the itinerary, select Add day to create a day. If the trip already has start and end dates, the days are created automatically.
- Select Add on the day card, then choose the Create spot tab in the dialog.
- Enter a Name and select a type such as accommodation, food, or sightseeing. Add an address, region, or website when useful.
- Put practical advice in Notes. Add named prices—such as “Admission” and “440”—under Menu / cost.
- Select Save to add the spot to that day.
A spot remains in your spot library and can be reused on future trips.
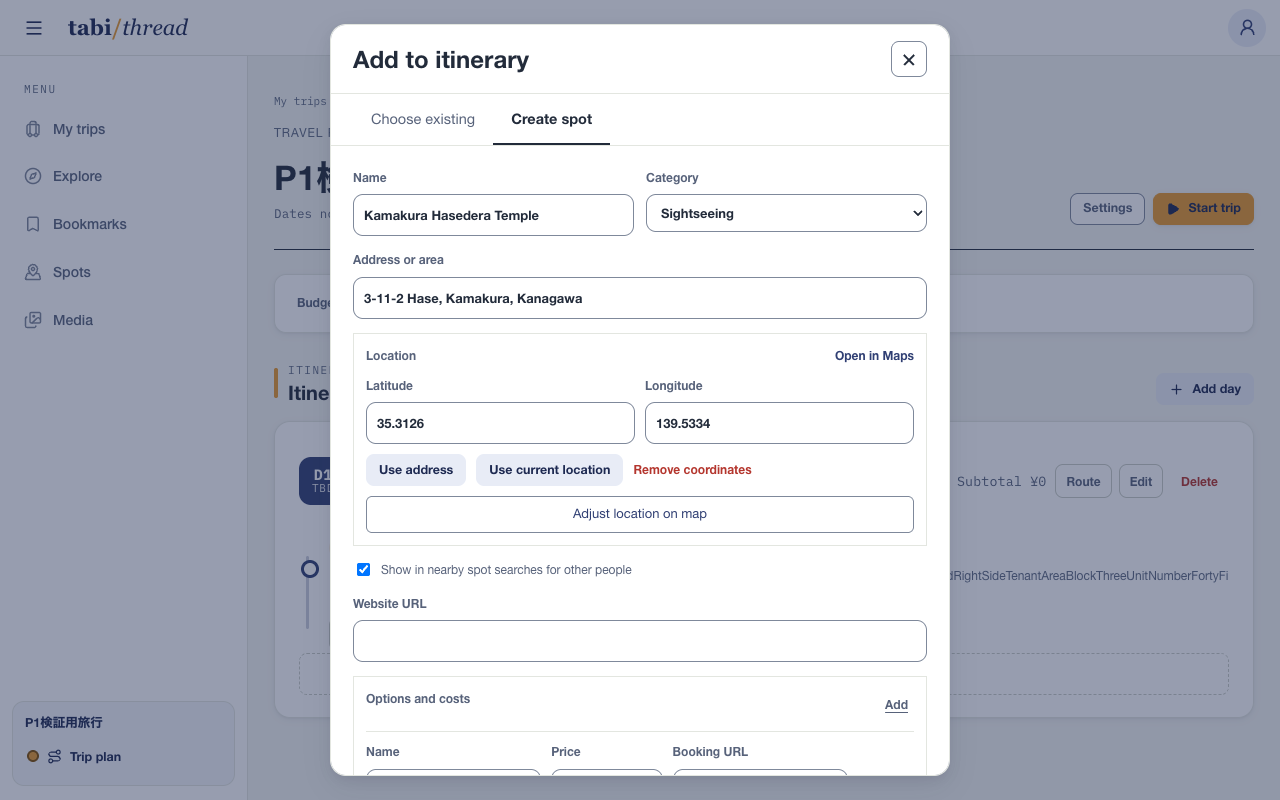
A spot can hold notes and priced items as well as its name and type.
4. Arrange the itinerary and estimate the budget
- Spots are arranged by day. Drag cards to reorder them or select Add day to extend the itinerary.
- Select Include in budget beside a priced item to add it to the estimate.
- The budget summary updates automatically by category, day, and entire trip.
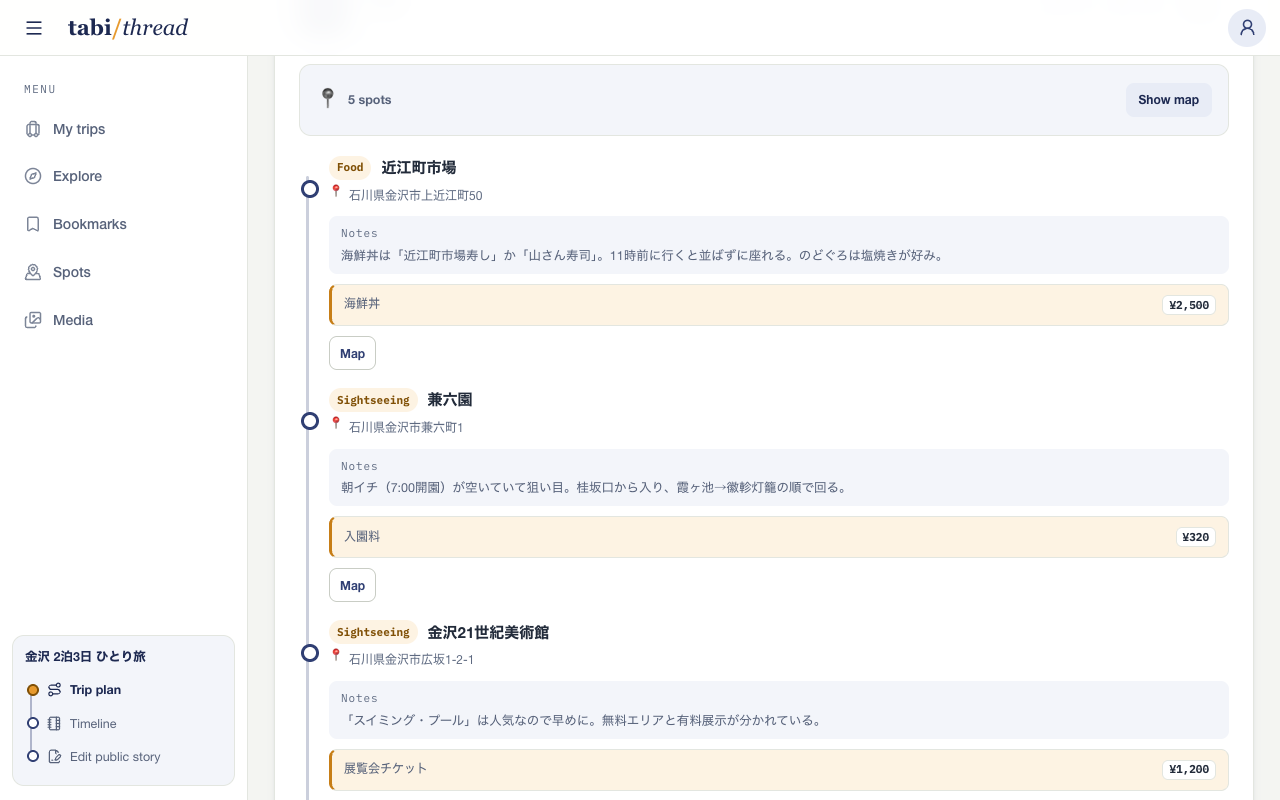
Selecting an item adds its cost to the trip budget.
5. Start the trip and record the journey
- When the plan is ready, select Start trip in the upper-right corner. The interface switches to the traveling view.
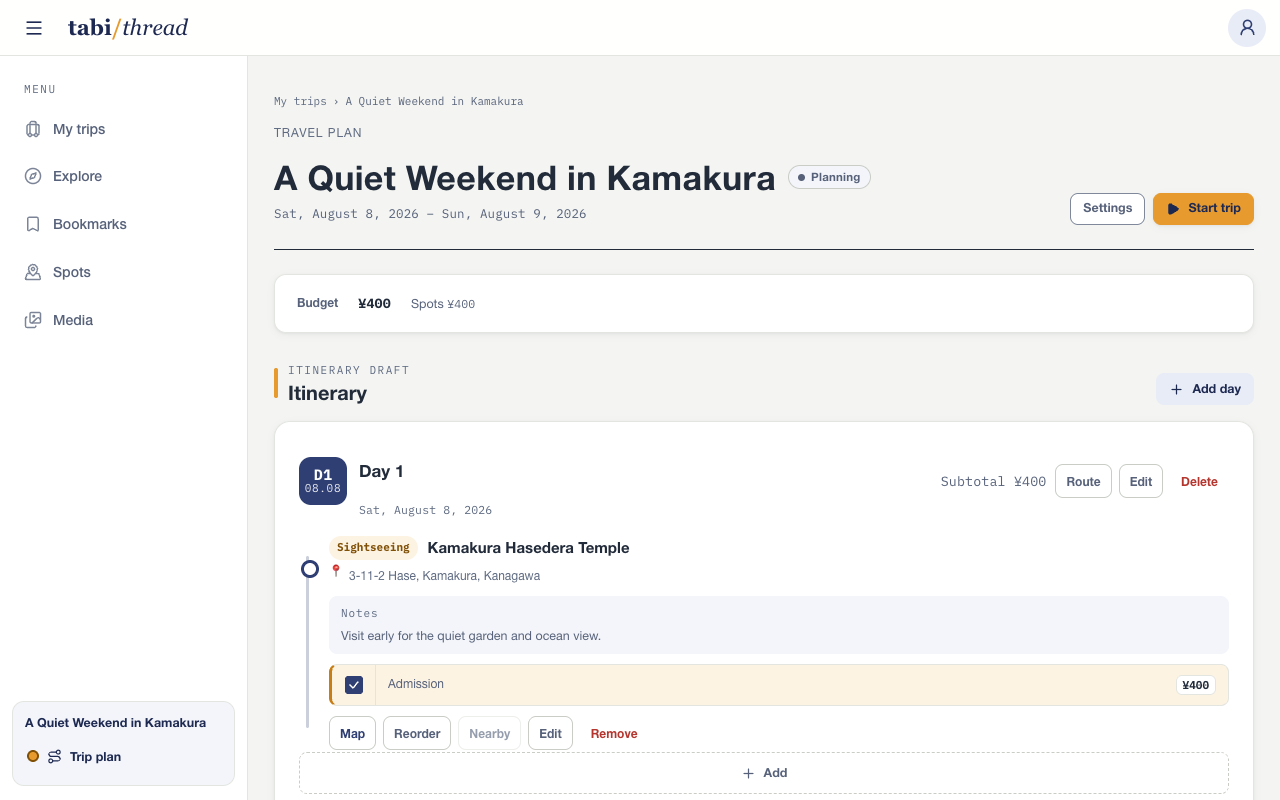
Start the trip when you are ready to record the journey.
- Open the thread for the day. On desktop, use the composer above the thread; on a phone, use the composer dock at the bottom.
- Write a note and select Post. Use Add photo, Add video, or Record location to attach more context.
- A post remains in the timeline if sending fails. Select Retry when the connection returns, or Discard to remove it deliberately.
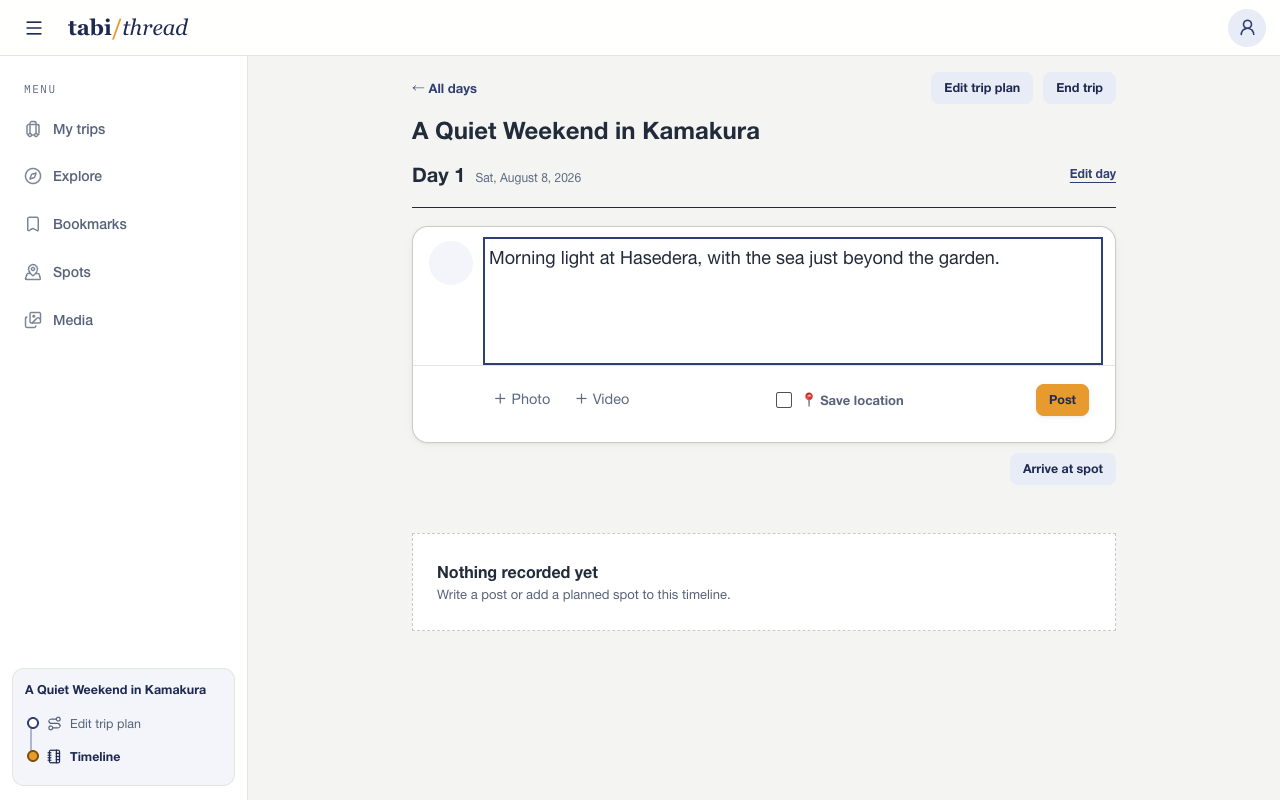
Leave a short note, photo, or location while the moment is still fresh.
6. Finish the trip and shape the journal
- After returning, select Finish trip, then confirm with Finish. The trip moves to the post-trip state and the journal editor becomes available.
- Open Edit public journal and refine its public title, summary, and body. Use Insert itinerary / posts to place itineraries, posts, spots, images, and maps in the article. The Preview tab shows the result as readers will see it.
- In Article settings, choose Japanese or English for the article. This controls generated labels and metadata; it does not translate anything you wrote.
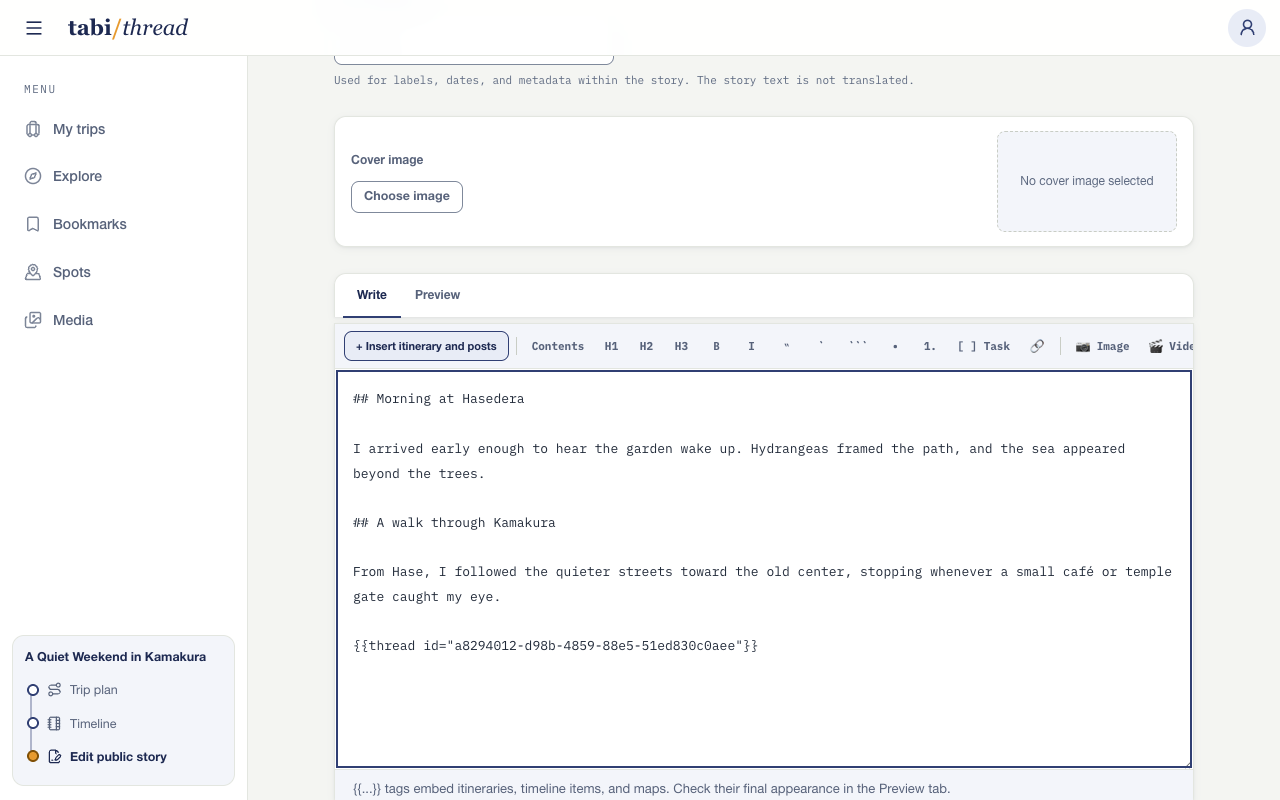
Turn the trail you recorded into a journal for readers.
- Select Publish when the journal is ready. Anyone with its URL can read it, and it appears in the public travel-journal list and search.
- Publishing is optional. Select Make private at any time to remove the journal from public view. While it is public, its status and URL remain visible in the editor header.
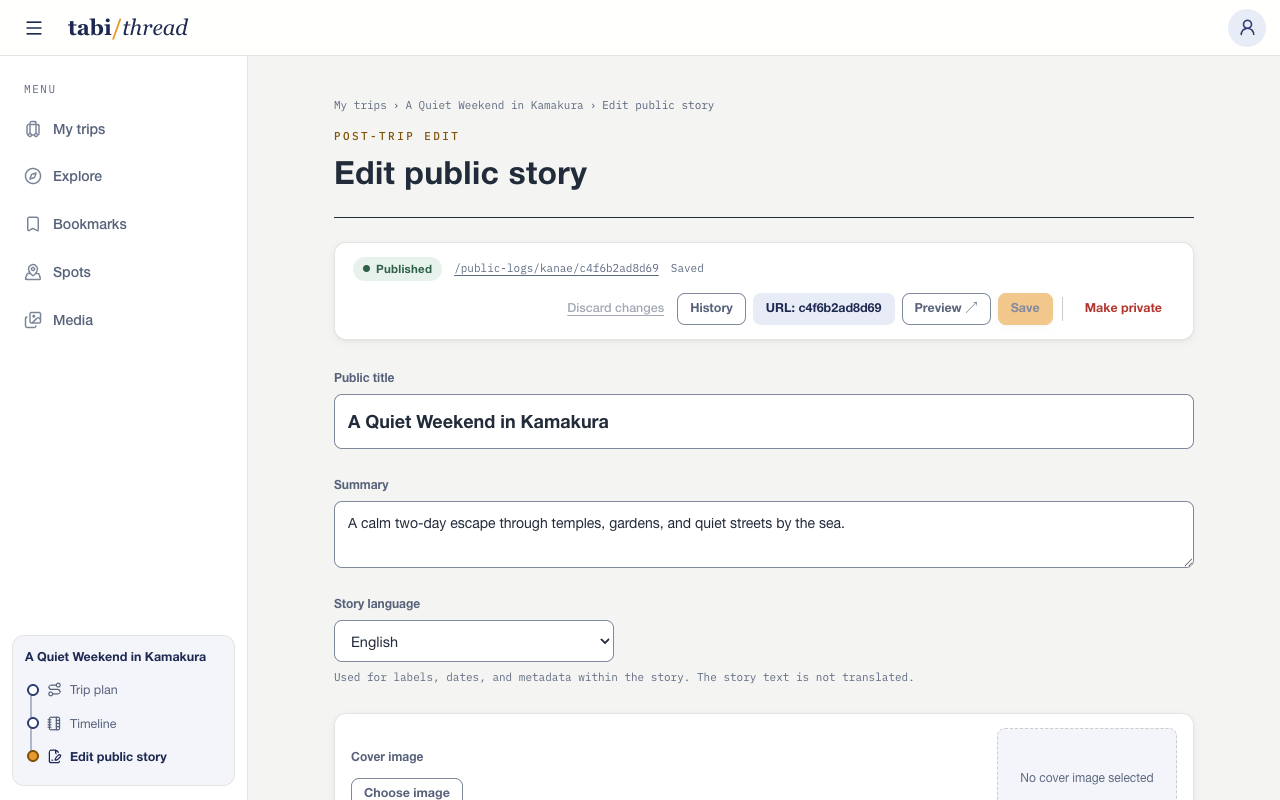
The editor shows the publication status and URL; a published journal can be made private again.